Getting Started with AWS
This guide opens an AWS account and does the first real things with it:
- Open the account and protect it.
- Create an S3 bucket in the console and upload a file.
- See the same bucket from CloudShell, then from the AWS CLI on your own computer.
- Delete what you made.
It takes about an hour. The slides The AWS Console, CLI and SDKs explain the tools this guide uses.
Open an AWS account
AWS's own guide, Sign up for AWS (advanced), walks through every screen of the sign-up. Use that sign-up: this course needs the account's root user, and AWS's newer sign-up makes none.
The sign-up asks for:
- An email address: it becomes the root user's login, and the way to recover the account.
- Use an address only you read.
- An account name, such as
firstname-lastname-course. - A root password: keep it in a password manager.
- A plan: choose the Free plan.
- Up to $200 in credits, for six months, on some services.
- A later lab may need the paid plan; we move to it then.
- Contact details, and the AWS Customer Agreement.
- A payment method: AWS refuses a sign-up without one, even on the free plan.
- A phone number that can receive an SMS now, for an identity check.
- A support plan: choose Basic support - Free.
The account is ready when AWS sends an email saying it is active: usually within minutes, at most 24 hours.
Sign in as the root user
- Open the
AWS console.
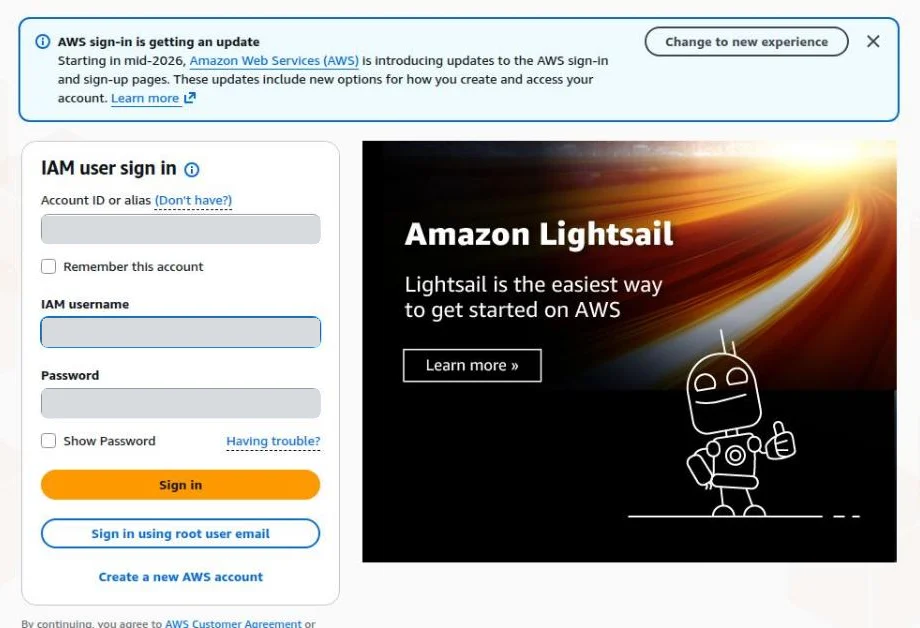
- The page opens on IAM user sign-in: the form for the users we create later.
- Click Sign in using root user email, and enter the root email address.
- Enter the root password.
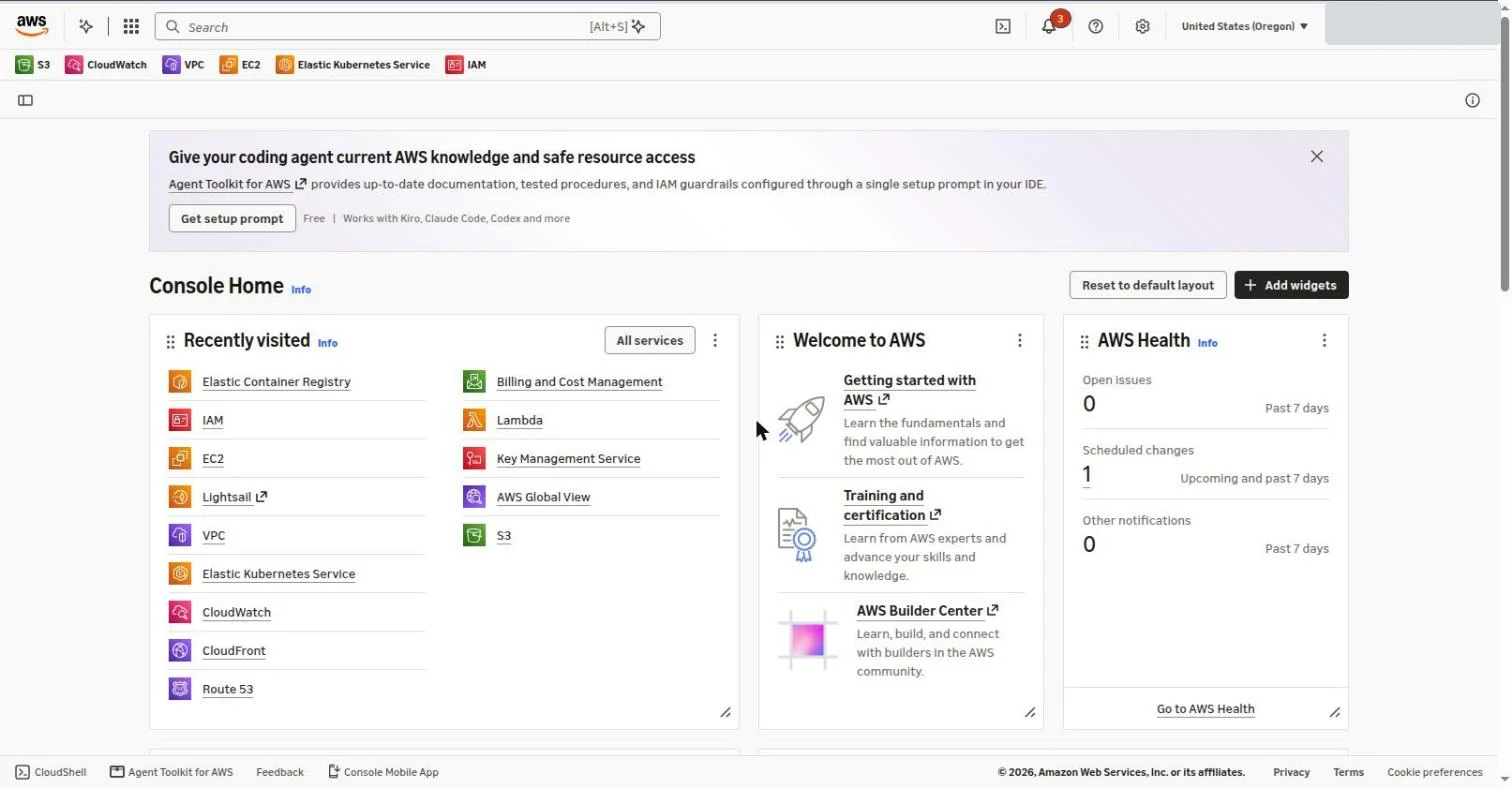
Console Home opens: the start page of the console.
Turn on MFA for the root user
The root user can do anything in the account, so it gets a second factor before anything else.
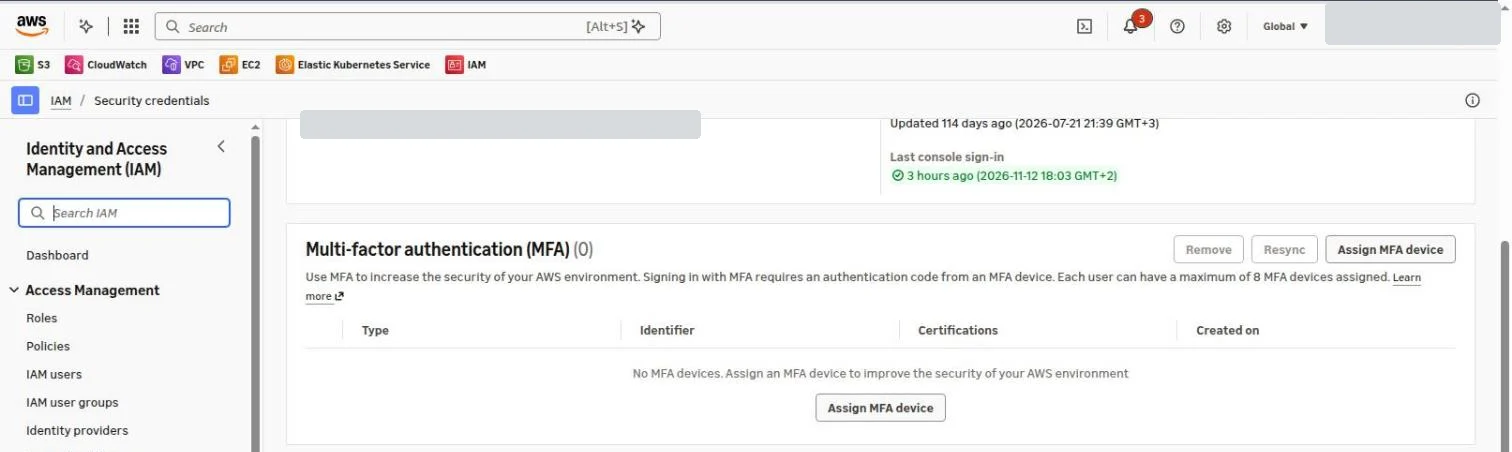
- Open the account menu at the top right and click Security credentials.
- Under Multi-factor authentication (MFA), click Assign MFA device.
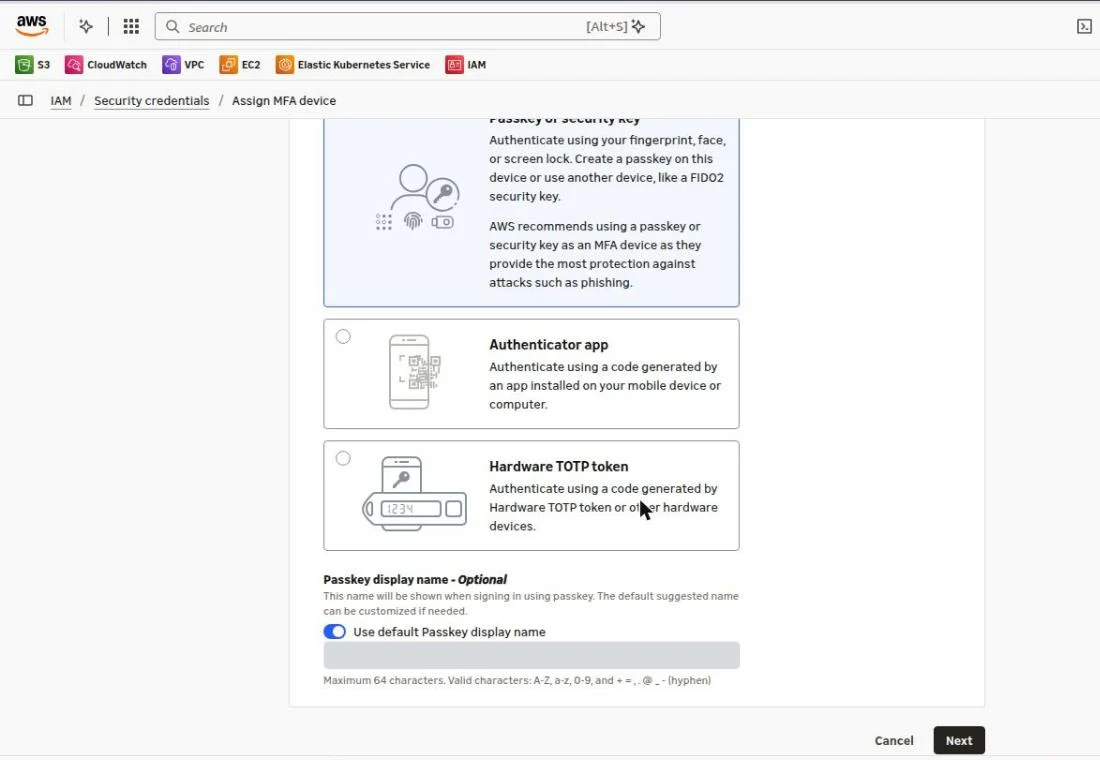
- Name the device, such as
root-phone. - Choose the kind of device:
- Passkey or security key: a fingerprint, a face or the screen lock, on this computer or a phone. AWS recommends it.
- Authenticator app: a 6-digit code from an app such as Google Authenticator.
- Click Next, and follow the browser's prompts.
- An authenticator app shows a QR code: scan it, then type two codes from the app, one after the other.
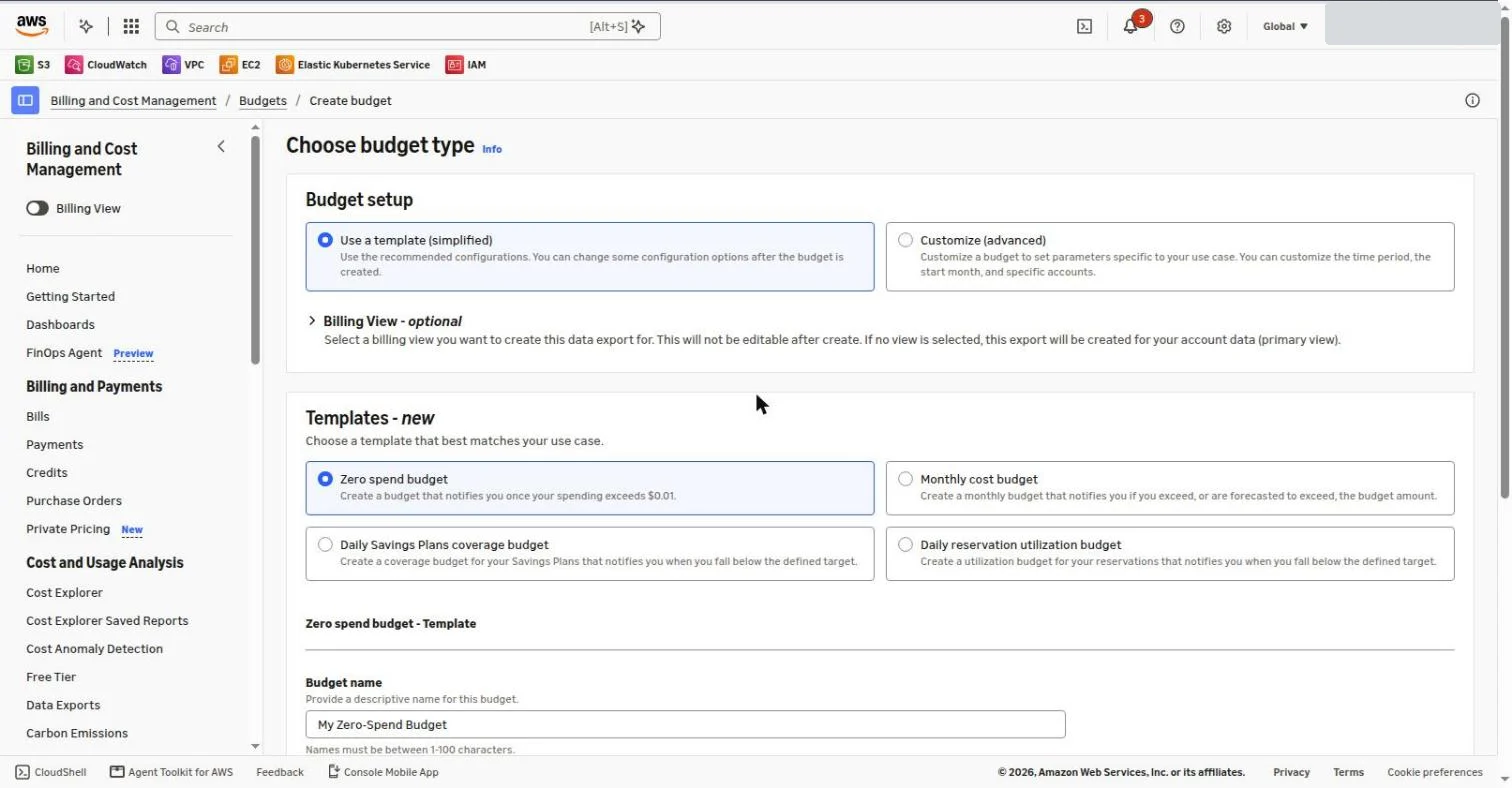
Set a zero-spend budget
A budget sends an email when the account starts to cost money.
- Type Budgets in the search bar and open it.
- Click Create budget.
- Use a template (simplified) and Zero spend budget are already chosen.
- Scroll down, enter your email address under Email recipients, and click Create budget.
Choose the Region
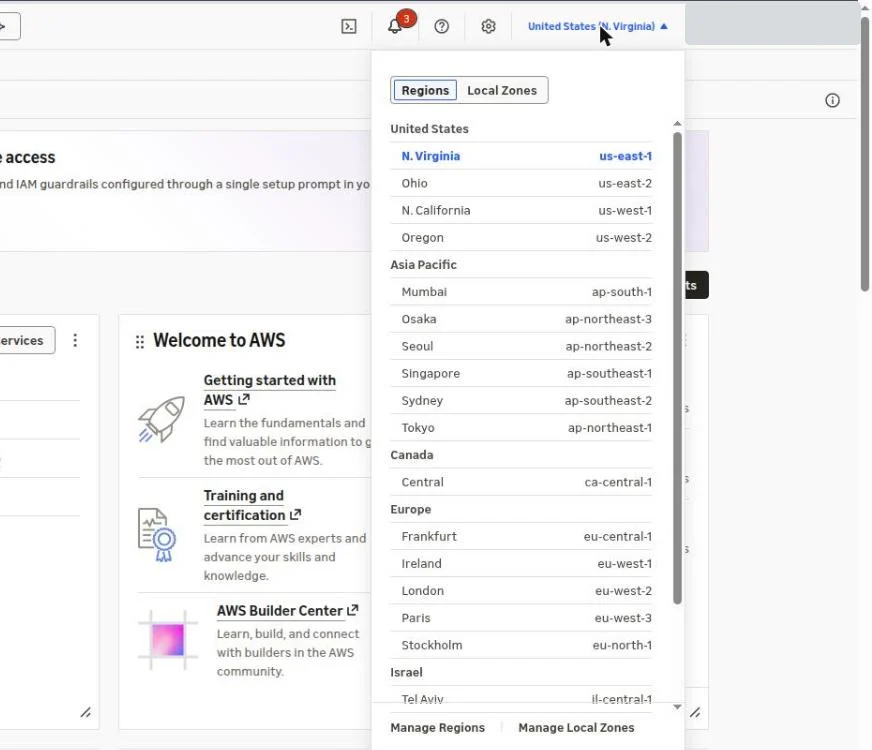
The Region selector at the top right picks where the console works. This course works in US East (N. Virginia),
us-east-1.
- Click the Region selector.
- Choose US East (N. Virginia).
Find the S3 service
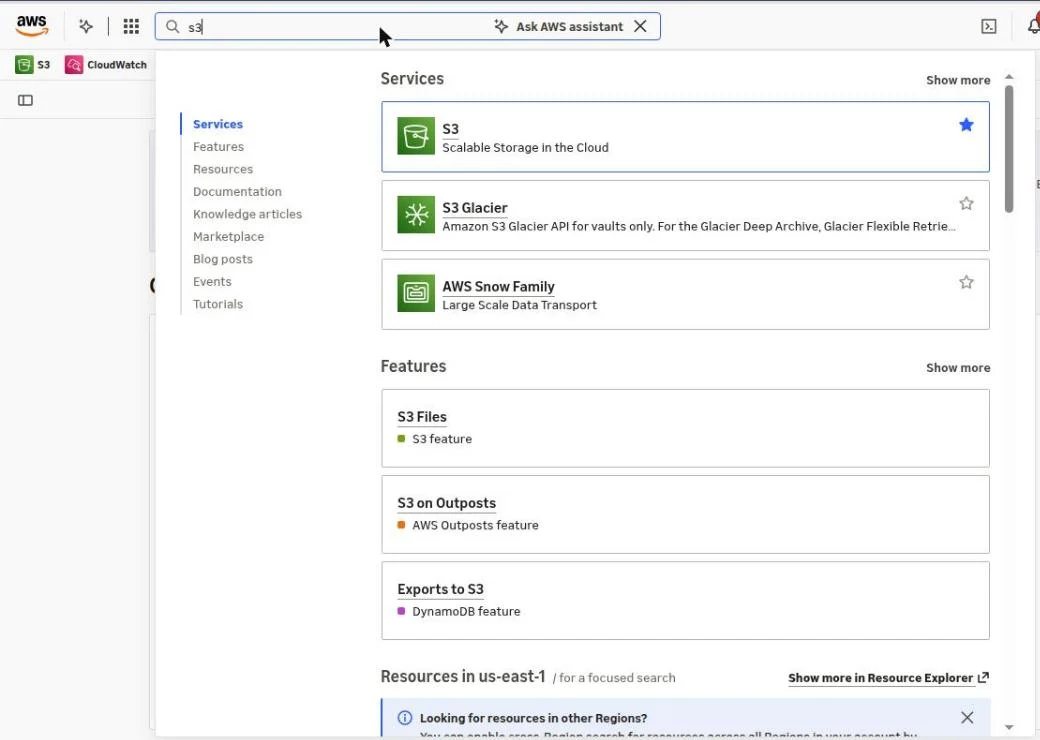
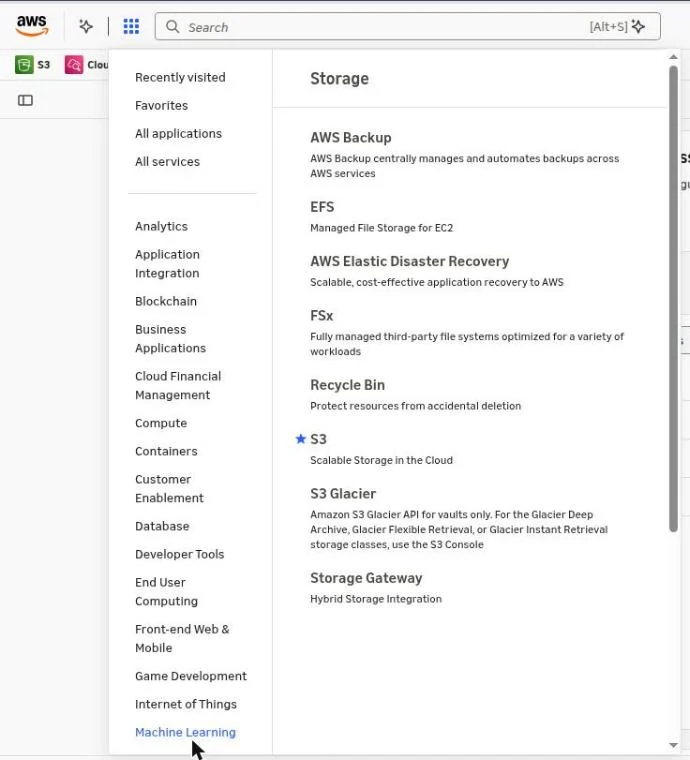
The console has three ways to reach a service.
- The search bar: type
s3, and pick S3 under Services.- Alt+S jumps to the search bar; on a Mac, Option+S.
- The ☆ beside a result adds it to the favorites bar under the top bar.
- The Services menu: the ▦ button left of the search bar.
- Its left column lists the categories; Storage holds S3.
- Console Home: Recently visited lists the services we opened last, and the favorites bar holds the starred ones.
Create an S3 bucket
A bucket is a place for files in S3.
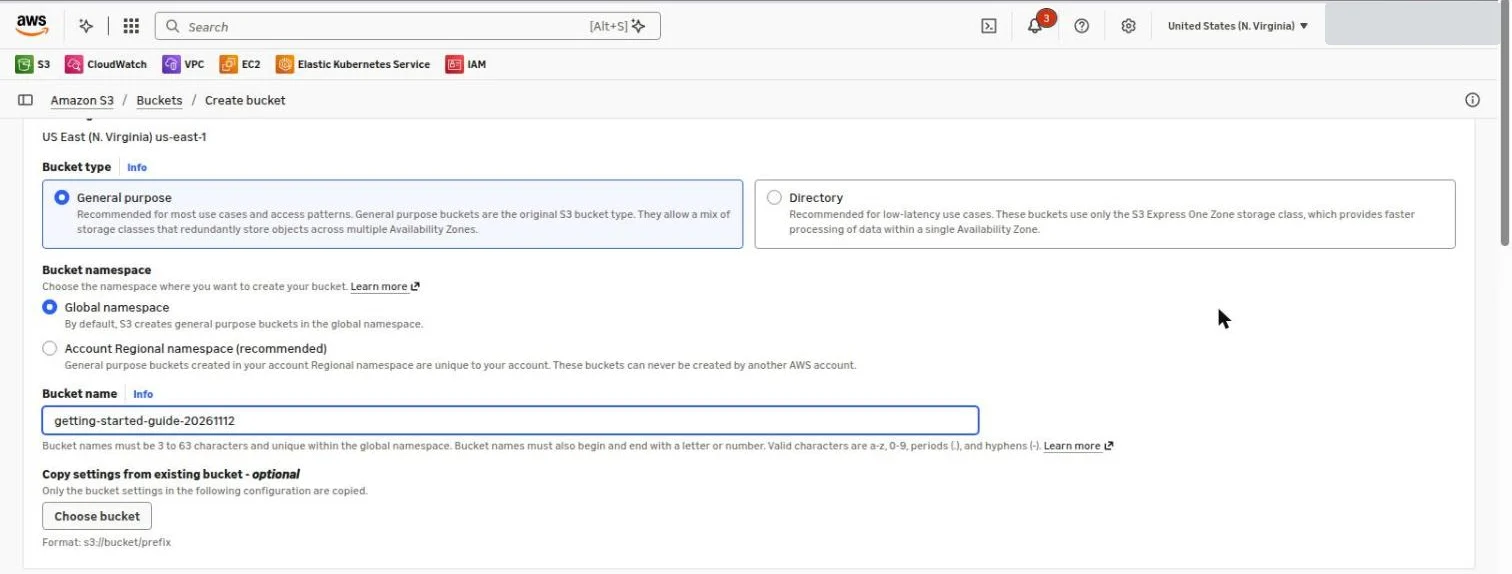
- In S3, click Create bucket.
- Keep General purpose and Global namespace.
- A bucket name in the global namespace must be unique across all of AWS.
- The other choice, Account Regional namespace, adds the account ID and the Region to the name.
- Enter a name with something of yours in it:
getting-started-guide-20261112.- Lower-case letters, digits and dashes only.
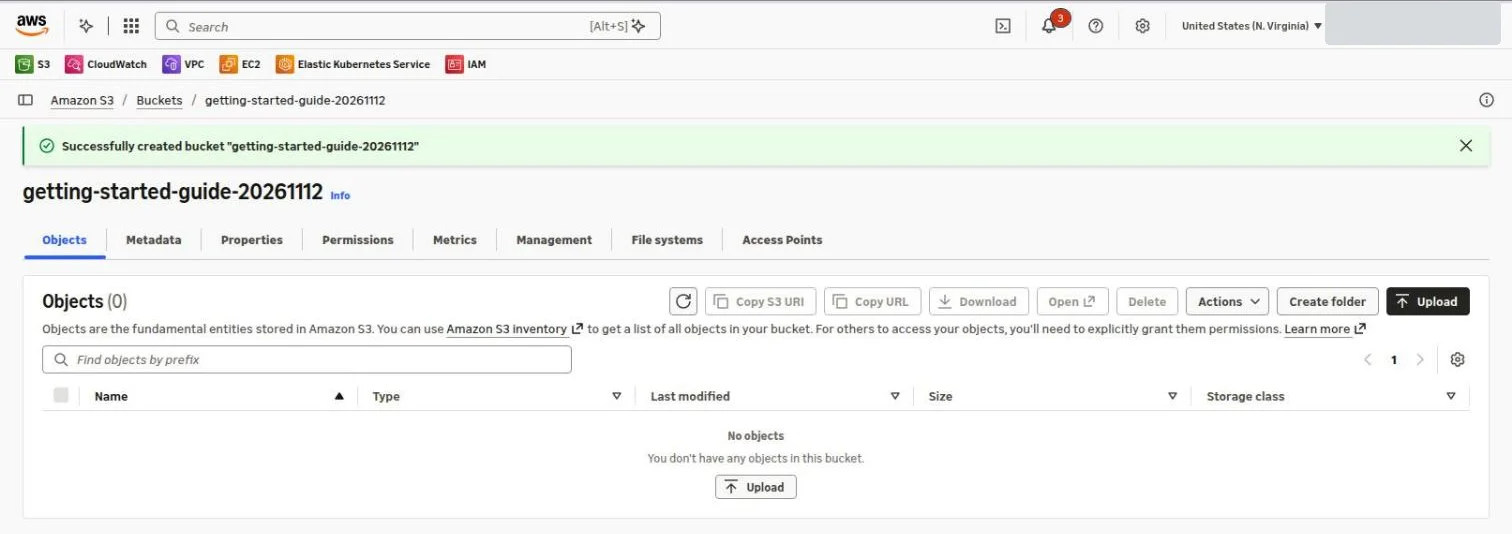
- Keep every other setting as it is, scroll down, and click Create bucket.
- The console opens the new bucket, still empty.
Upload a file to the bucket
- On the bucket's page, click Upload.
- Click Add files, and pick a small file: here, a text file named
welcome.txt.
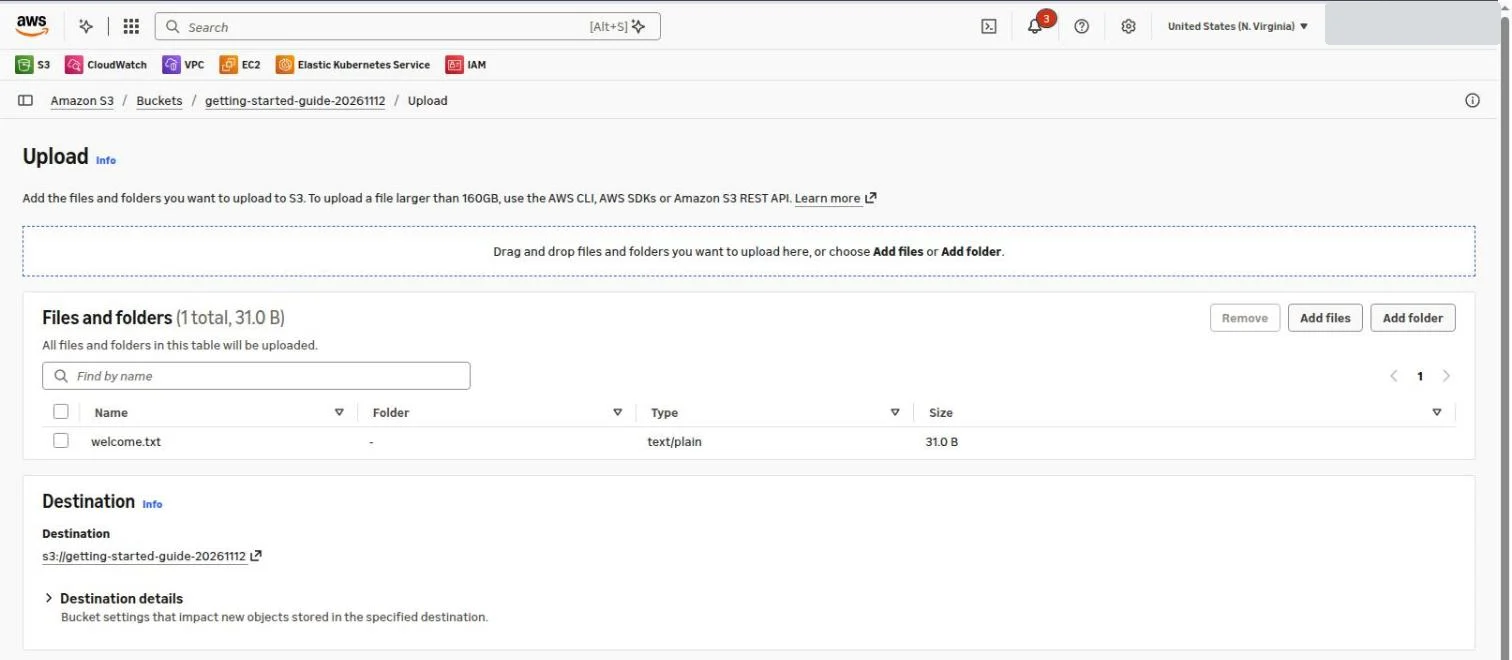
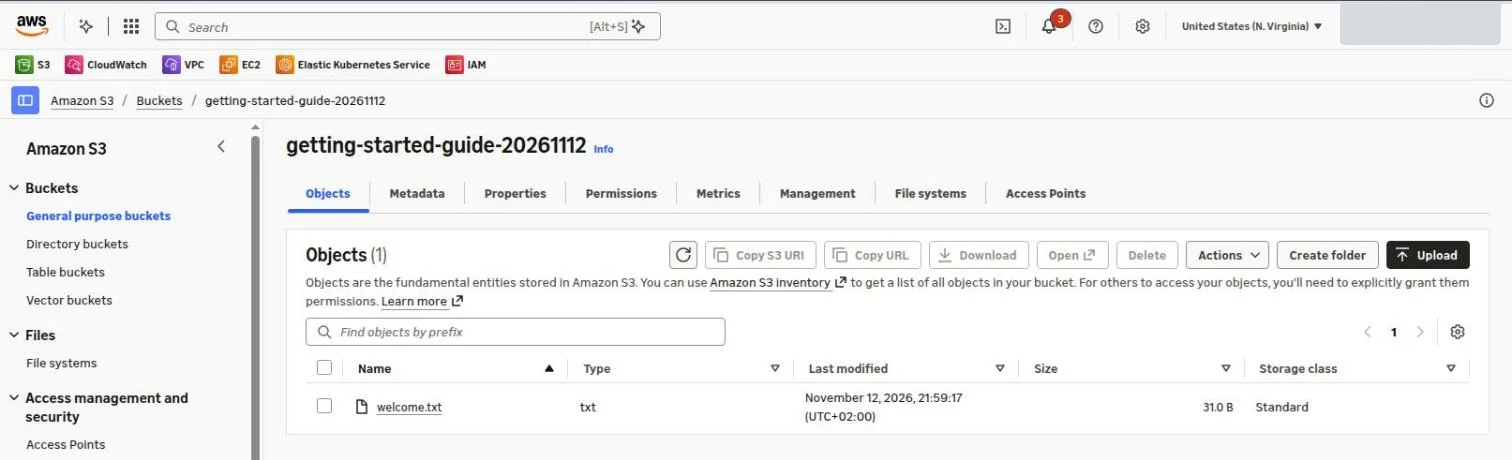
- Scroll down and click Upload, then Close.
- The bucket's Objects tab now lists the file.
Open CloudShell
CloudShell is a Linux shell in the browser, signed in as you, with the AWS CLI installed.
Click the
>_icon on the console's top bar.- CloudShell opens under the page, in the console's current Region.
Wait for the
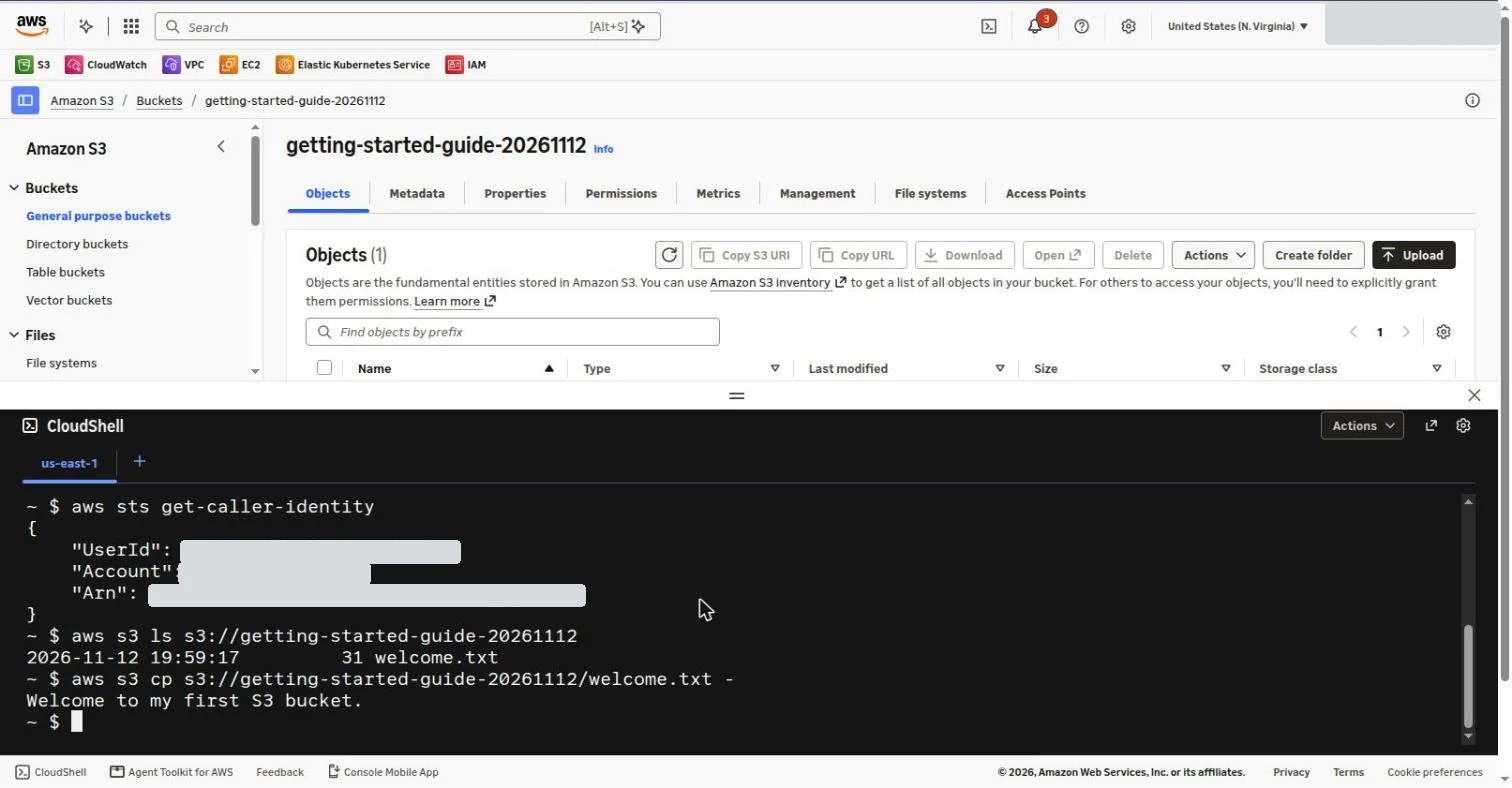
$prompt, then run:1$ aws sts get-caller-identity 2{ 3 "UserId": "111122223333", 4 "Account": "111122223333", 5 "Arn": "arn:aws:iam::111122223333:root" 6} 7$ aws s3 ls s3://getting-started-guide-20261112 82026-11-12 19:59:17 31 welcome.txt 9$ aws s3 cp s3://getting-started-guide-20261112/welcome.txt - 10Welcome to my first S3 bucket.- The first command names who we are: the root user.
- The second lists the bucket.
- The third prints the file:
-as the target means the screen.
Install the AWS CLI on your computer
On Linux:
1$ curl "https://awscli.amazonaws.com/awscli-exe-linux-x86_64.zip" -o "awscliv2.zip"
2$ unzip awscliv2.zip
3$ sudo ./aws/install
4You can now run: /usr/local/bin/aws --version
5$ aws --version
The version must be 2.32.0 or later, for aws login.
On macOS or Windows
Download the installer from AWS's
install page
and run it. Then open a new terminal and run aws --version.
Sign the CLI in with aws login
aws login signs the CLI in through the browser, with the account we just signed in to.
Run:
1$ aws login 2Attempting to open your default browser. If the browser does not open, open the following URL. 3If you are unable to open the URL on this device, run this command again with the '--remote' option. 4 5https://us-east-1.signin.aws.amazon.com/v1/authorize?response_type=code&client_id=...- If it asks for a Region first, answer
us-east-1.
- If it asks for a Region first, answer
The browser opens on Continue with an active session, showing the session we signed in to the console with. Click it.
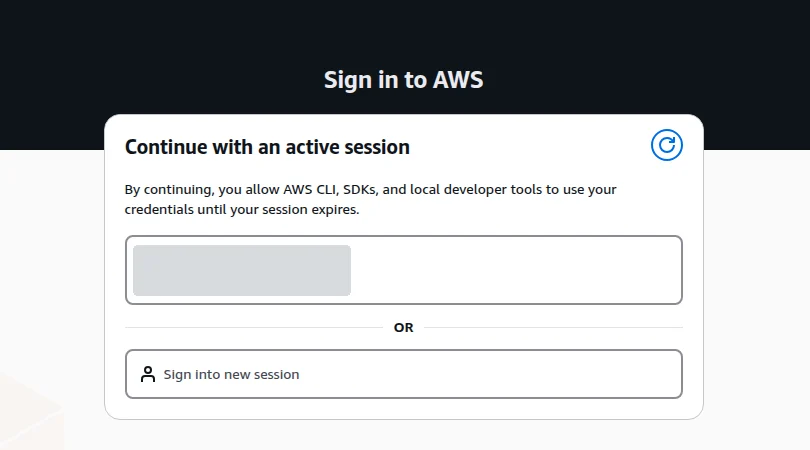
Back in the terminal, the CLI is signed in for up to 12 hours.
We sign in as the root user only in this guide. The IAM part of the course creates an admin user, and from then on we use it instead.
Copy a file to the bucket from your computer
1$ aws sts get-caller-identity --query Arn --output text
2arn:aws:iam::111122223333:root
3$ echo "hello from my computer" > hello.txt
4$ aws s3 cp hello.txt s3://getting-started-guide-20261112/
5upload: ./hello.txt to s3://getting-started-guide-20261112/hello.txt
6$ aws s3 ls s3://getting-started-guide-20261112
72026-11-12 22:01:09         23 hello.txt
82026-11-12 21:59:17         31 welcome.txt
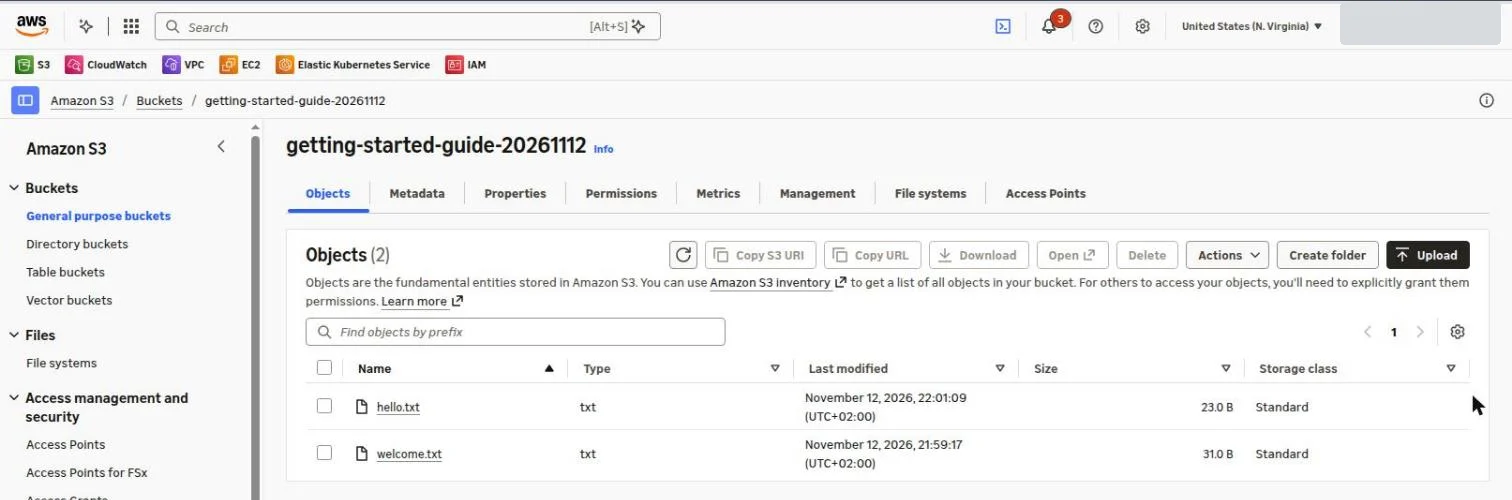
Click the refresh button (↻) on the bucket's page in the console: hello.txt is there too.
Delete the bucket
The bucket costs almost nothing, but a lab ends clean.
1$ aws s3 rb s3://getting-started-guide-20261112 --force
2delete: s3://getting-started-guide-20261112/hello.txt
3delete: s3://getting-started-guide-20261112/welcome.txt
4remove_bucket: getting-started-guide-20261112
5$ aws logout
--forcedeletes the files first, since S3 refuses to delete a bucket that holds any.- Keep the MFA device and the budget: they protect the account from now on.